
Are you looking for a way to clear your computer’s cache? This is how it works with Windows 10 and Windows 11.
Have you ever had problems with a particular website working, such as poorly loading images, login problems, or regular crashes? Then you will often get the first answer that you have to clear your browser cache, and see if it works after that. In most cases, this is actually a really workable solution. However, the same steps also apply to your computer.
Temporary data is stored in a cache that allows you to quickly get started in your system, be it a computer, a browser or an application. With quick access, you can load everything faster, so emptying it regularly can solve or prevent a lot of recurring problems. Do you think you could benefit from this on your own? Then we show you how to do it step by step. By the way, don’t worry: the steps to do this with Windows 10 and 11 are exactly the same.
“Raise your PC’s performance in an instant.”
1. Windows
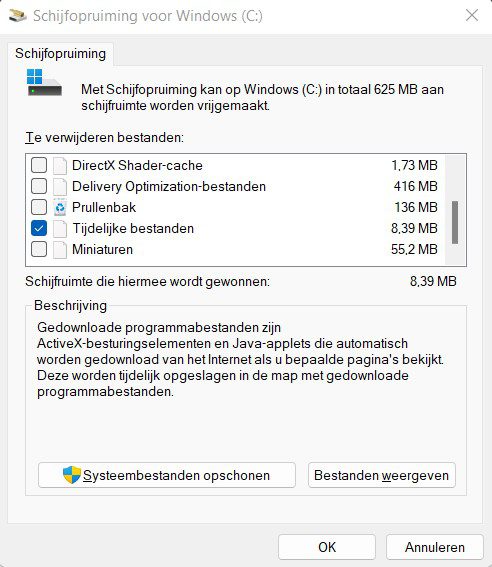
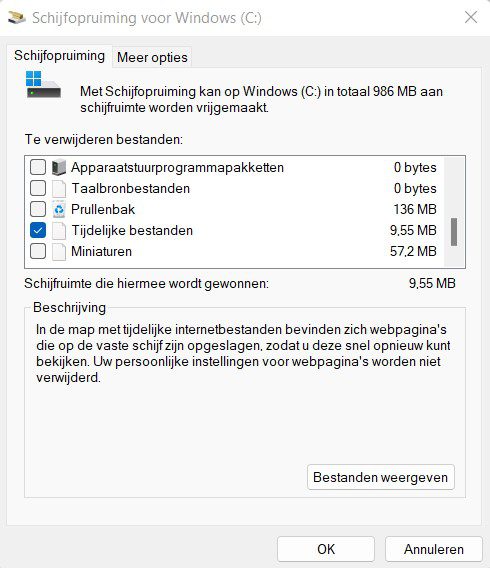
To start clearing the cache, you must first press the Windows key on your keyboard, or open the Windows start menu. Then type “Disk Cleanup” if you’re running a Dutch version of the operating system, or “Disk cleanup” for English. Press Enter and a window with the necessary application will appear.
2. Select the room
In the Disk Cleanup app, you have the option to select multiple files on your computer that you’d like to delete. What you should definitely check here to clear the cache is the “Temporary files” box. If you don’t want to leave it at that, there are several files you can delete. We definitely think of “temporary internet files” and “downloaded program files”. If you want to continue, you can also easily empty the Trash this way.
3. Confirm
Once you have selected everything you want to delete, click on Clean System Files at the bottom left. Then the app will calculate how much space you will save with this and you will automatically go back to the previous window. Here you have to choose again exactly what you want to remove from the list.
4. Delete
Press OK a second time, and you’ll see a notification asking if you’re sure you really want to delete the selected files. Once all this is confirmed, the app will work for you to get rid of everything on your PC in a jiffy. If you encounter any problems, you can solve them as easily as possible. Keep in mind that you always know what you throw out of your device, because you can’t always get everything back.
Note: This product requires JavaScript.