Your iPhone has many default settings. It is best to leave most of them unchanged, but there are also iPhone settings that we will immediately adjust. For example, they improve battery life, privacy, or usability.
iPhone settings
It doesn’t matter if you are an experienced iPhone user or if you have a phone from Apple for the first time. There are always settings you can change in iOS 16 to make your iPhone work better for you. We take you through 17 settings you might want to change.
1. Prevent apps from knowing your exact location

Some apps require that they know exactly where you are right now on the meter – such as a navigation app like Google Maps. But a weather app or a travel app, a less accurate location would suffice as well.
On iOS, it is possible to share a less precise location with an app. Your iPhone then provides an approximate location, which is accurate to within a few miles. This way you still benefit from local information in the app, while your privacy remains well protected.
This is how to set it up:
- Open the Settings app;
- Click on “Privacy > Location Services”;
- Click on an app and set the “Precise location” slider to grey.
2. Don’t let your iPhone go to sleep
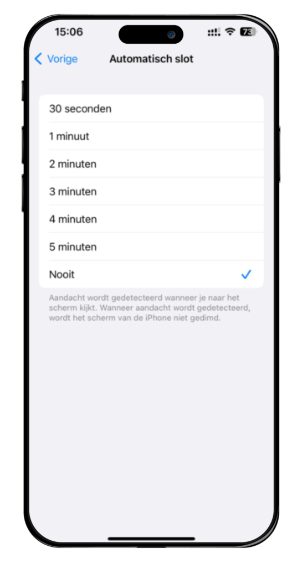
If you don’t touch your iPhone for a while, it goes to sleep right away: annoying. The first thing we do when testing a new iPhone is Disable iPhone sleep mode. This is how you do it:
- Open the Settings app;
- Click on “Display & Brightness”.
- Scroll down and tap Auto Lock.
- Choose Never.
More iPhone tips like this? Register to get our latest news:
Unfortunately, your registration was not successful. Please try again later.
3. There is no double notification in messages
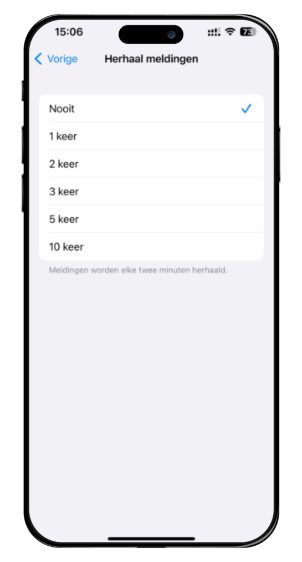
Have you ever received messages via the iPhone Messages app? By default, the app sends a notification, not once, but twice! Fortunately, there is a way to turn off duplicate messages notification:
- Open the Settings app;
- tap on “Notifications”;
- click on “Messages”;
- select “Customize notifications”;
- Set Repeat Notifications to Never.
4. Add controls to the control panel
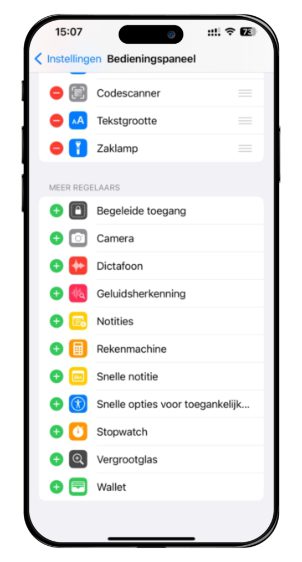
Control Center is a way to quickly access various iPhone functions, such as the timer, flashlight, or calculator. With the new iPhone, we are still missing some buttons, such as Shazam, doing screen recording and power saving mode.
You can arrange the buttons you see in the control panel in this way:
- Open the Settings app;
- Click on “Control Panel”;
- Scroll down and tap the green button next to Controls to add them.
5. Prevent iPhone from turning on when lifted
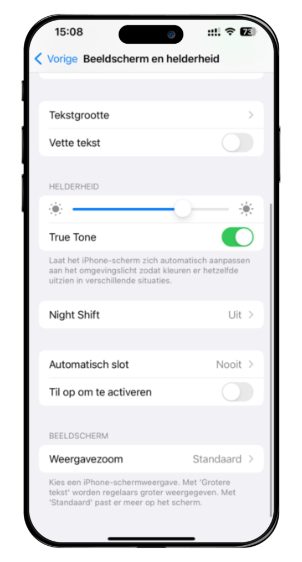
When you lift your iPhone to look at it, the device automatically wakes up. nuisance? This is how to turn it off in iPhone Settings:
- Open the Settings app;
- go to “display and brightness”;
- Switch the switch behind “Raise to activate” to grey.
6. Do not write a period after two spaces
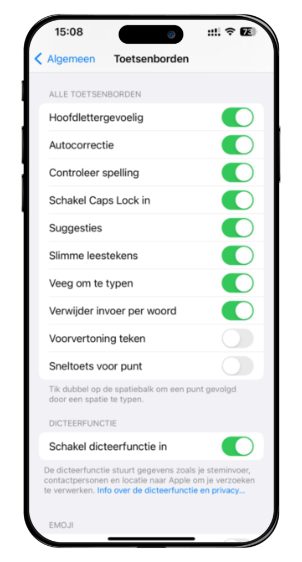
How often do you accidentally write a period in the middle of a sentence because you hit the space bar twice? Just turn it off:
- Open the Settings app;
- go to “keyboards”;
- Set “Shortcut Period” to grey.
7. Get rid of Memoji stickers
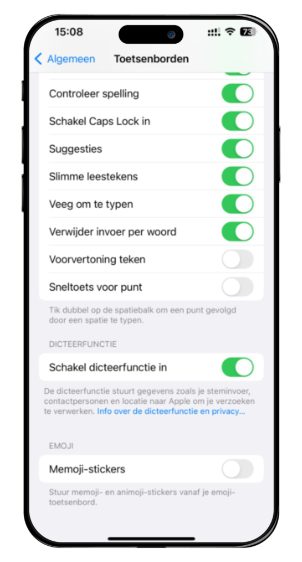
Have you ever been sent Memoji stickers? Or do you plan to do it someday? If no twice, the stickers in emoji keyboard are just a hitch. How to remove stickers:
- Open the Settings app;
- go to “keyboards”;
- Set “Memoji Stickers” to grey.
8. Create a “shortcut” to your email address
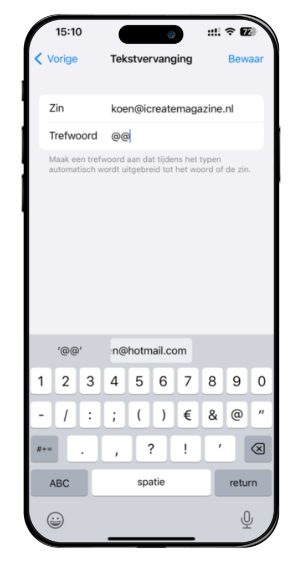
This tip will save you a lot of time. Typing email addresses is very time consuming and you do it almost every day. By following these steps once, you can fetch your email address in two clicks:
- Open the Settings app;
- Go to “Text Replacement”;
- press the plus button at the top right;
- Enter your email address in the upper entry field;
- Type “” in the lower input field
Every time you type followed by a space, your iPhone converts those characters into your email address.
9. Turn off the sound on keystrokes
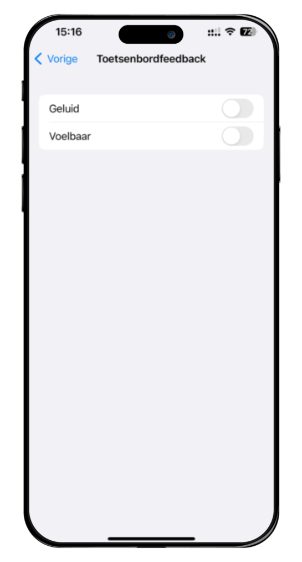
By default, when you type, you hear a beep with every keystroke. You may find it annoying, otherwise your onlookers will. So turn it off and do it now.
- Open the Settings app;
- Go to “Hear and Feel > Keyboard Feedback”;
- Turn off the Sound.
You can also turn off touch in the same window. The iPhone will not vibrate when typing which is good for battery life.
10. Set Google Chrome as the default browser
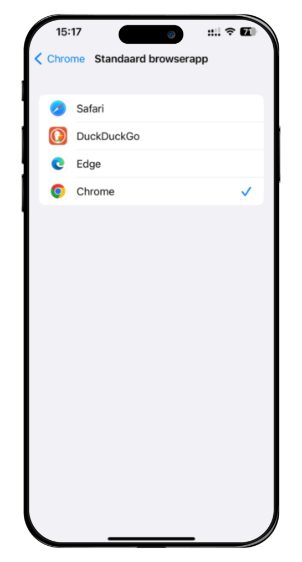
If you click on a link in an app, the iPhone will open it by default in Apple’s browser: Safari. If you prefer another browser, you can set it as default:
- Open the Settings app;
- Scroll down and tap a browser, such as “Chrome”;
- Click on “Default Browser Application”;
- Select your preferred browser.
11. Activate Apple Pay
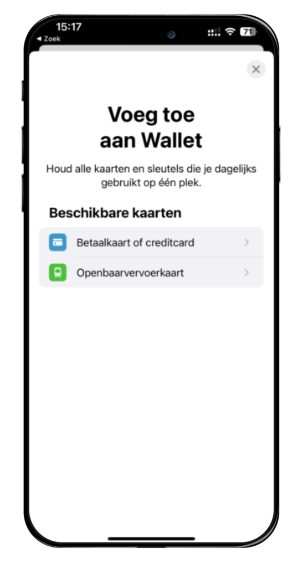
Use your iPhone as a debit card: This is possible thanks to Apple Pay. To do this, you have to set up Apple Pay once. You can do this in the iPhone settings as follows:
- Open your iPhone wallet app;
- press the plus button at the top right;
- Select “Debit Card or Credit Card”;
- Select your bank and go through the steps.
12. Automatically enable Do Not Disturb
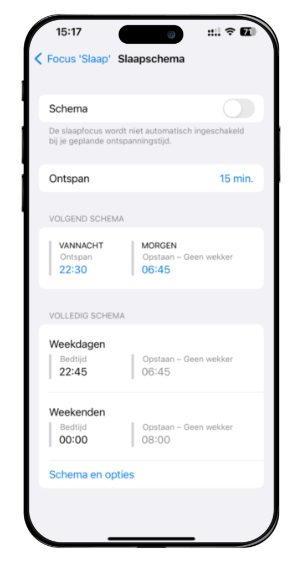
When you go to sleep or in dreamland, you don’t want to be disturbed by notifications. You can now set your iPhone to Do Not Disturb every time you go to sleep, but you can also set your iPhone to do this automatically every day.
- Open the Settings app;
- tap on focus and go to sleep;
- Click on the button below “Schedule”;
- Select via “Schedule & Options” when you don’t want to be disturbed by notifications.
Don’t you want to be disturbed when you are in a certain place, like the office? Then tap Focus > Do Not Disturb in Step 2. Via Add Schedule > Location, you can set your iPhone not to disturb you with notifications when you are at work.
13. Turn off Live Photos
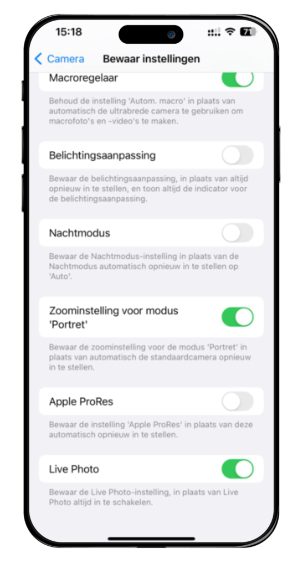
By default, every time you take a photo, your iPhone records a short video clip. Not everyone likes live photos. This is how to turn off Live Photos in iPhone Settings:
- Open the Settings app and tap on “Camera”;
- choose “Save settings”;
- Set “Live Photo” to green.
- open the camera application;
- Make sure the Live Photos icon in the top left (circles) is turned off. Then there is a diagonal line through it.
Since you just set your iPhone to save your Live Photo setting, Live Photos are now off by default — unless you activate the option in the Camera app.
14. Block “track request” pop-ups

Almost every time you open a new app, you will be asked if the app can track you. You probably don’t want that, because that way apps can track you even when you’re not using the app.
The popup pops up a lot, and if you already know your answer is “no” every time, it’s best to disable tracking requests. For example, all tracking requests are automatically rejected.
- Open the Settings app;
- Click on “Privacy and Security”;
- Click on “Trace”;
- Set “Allow Application Tracking Requests” to grey.
15. No personal ads
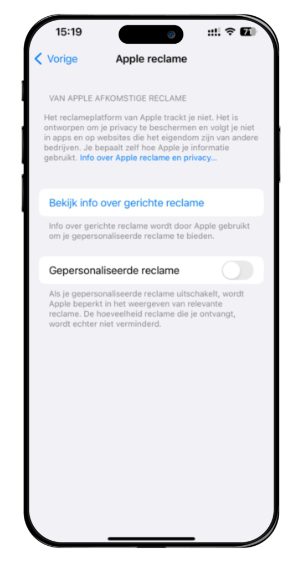
Apple cares deeply about user privacy, but they use your data to sell ads. For more privacy, you can turn off personalized ads.
- Open the Settings app;
- Click on “Privacy and Security”;
- Scroll down and click on “Apple ads”;
- Turn off Personalized Ads.
16. Enable iPhone Auto Backup
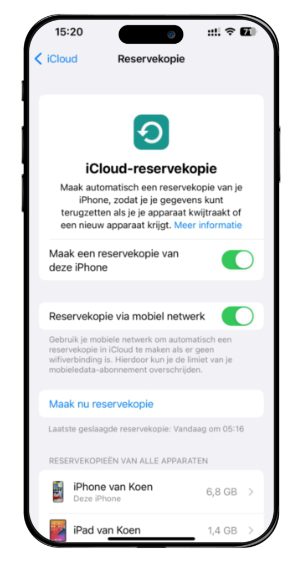
The easiest way to keep your iPhone data safe is to let iCloud automatically back up your iPhone every day. This way you don’t have to worry about it. So activate:
- Open the Settings app;
- Click on your name at the top;
- Click on “iCloud” and select “iCloud Backup”;
- Set the switch next to “Back up this iPhone” to green.
17. Activate dark mode automatically
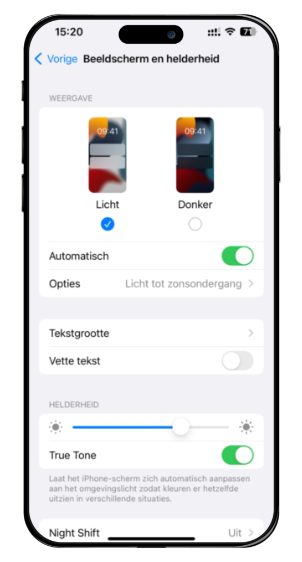
Dark mode is not only easier on the eyes at night: with iPhones with an OLED display, it also ensures long battery life. Activation can be done manually, but it is more convenient to activate the dark mode automatically after sunset:
- Open the Settings app;
- Click on “Display and Brightness”
- Set the switch behind “Auto” to green;
- Under Options, select Sunset to Sunrise.
Happy with tips? Subscribe to our newsletter and get the most out of your iPhone, iPad and other Apple devices:
Unfortunately, your registration was not successful. Please try again later.